Repairing brakes on a 1988 Acura Legend
Front brake repair (rotor + brake pads) on the Acura Legend.
Did some work on the old “red dragon” over the last couple of days. Changed the rotors and brake pads on both the front wheels, and a caliper bracket on the driver’s side.
Cost of Repair
- 2 Rotors + 2 sets of pads = $56.22 (could have saved ~$7, because brake pads come in sets of 2-pairs, i.e. 4 brake pads). Ordered from Rockauto.com
- Lubricants & chemicals/consumables = $20.17 (Brake cleaner + copper anti-seize + threadlocker + silicone lubricant). Ordered from Amazon.com
- Special tools = $46.60 (torque wrench + metal brush)
- Caliper Bracket + Brake pad spreader = $31.50. Bought from an Oreilly Auto Parts Store. The caliper bracket was the only unplanned cost that cropped up because I managed to strip one of the threads in the driver’s side caliper bracket.
Total: $154.49 (a very similar job from Meineke cost $350 a couple of years back)
The “Red Dragon” (1988 Acura Legend) was showing signs of uneven rotor wear (or warped rotors) for the past couple of months. Braking from 50mph and higher caused the steering to judder/vibrate. There were two options: a) test if a rotor’s runout was within tolerances using a run-out indicator (also called a dial indicator), and b) replace both the front rotors and pads. I chose to go with replacing the parts because the brake pads were getting worn out anyway, and buying a dial indicator just to measure these tolerance did not make sense (especially with the replacement rotors being relatively inexpensive).
Starting with the driver’s side (left side), opening up the caliper showed a massive amount of rust buildup. It is not surprising in Chicago’s winter, but I found the rust on the caliper piston especially troubling. That repair would have to be for another day.

Disassembling the old rotor took some doing. Even after using WD40, and having a decent sized ratchet/socket arm, the caliper bracket mounting bolts were hard to take off.

During this process, I managed to strip one of the threads in the caliper bracket (see the spring like/helical wire next to the bolt, that’s the thread :(). This meant that the repair would have to be completed the next day after buying a new caliper bracket from Oreilly Auto Parts.

The new bracket did not come with caliper pins, so I had to take disassemble them from the old bracket, clean and lubricate them with silicone grease.

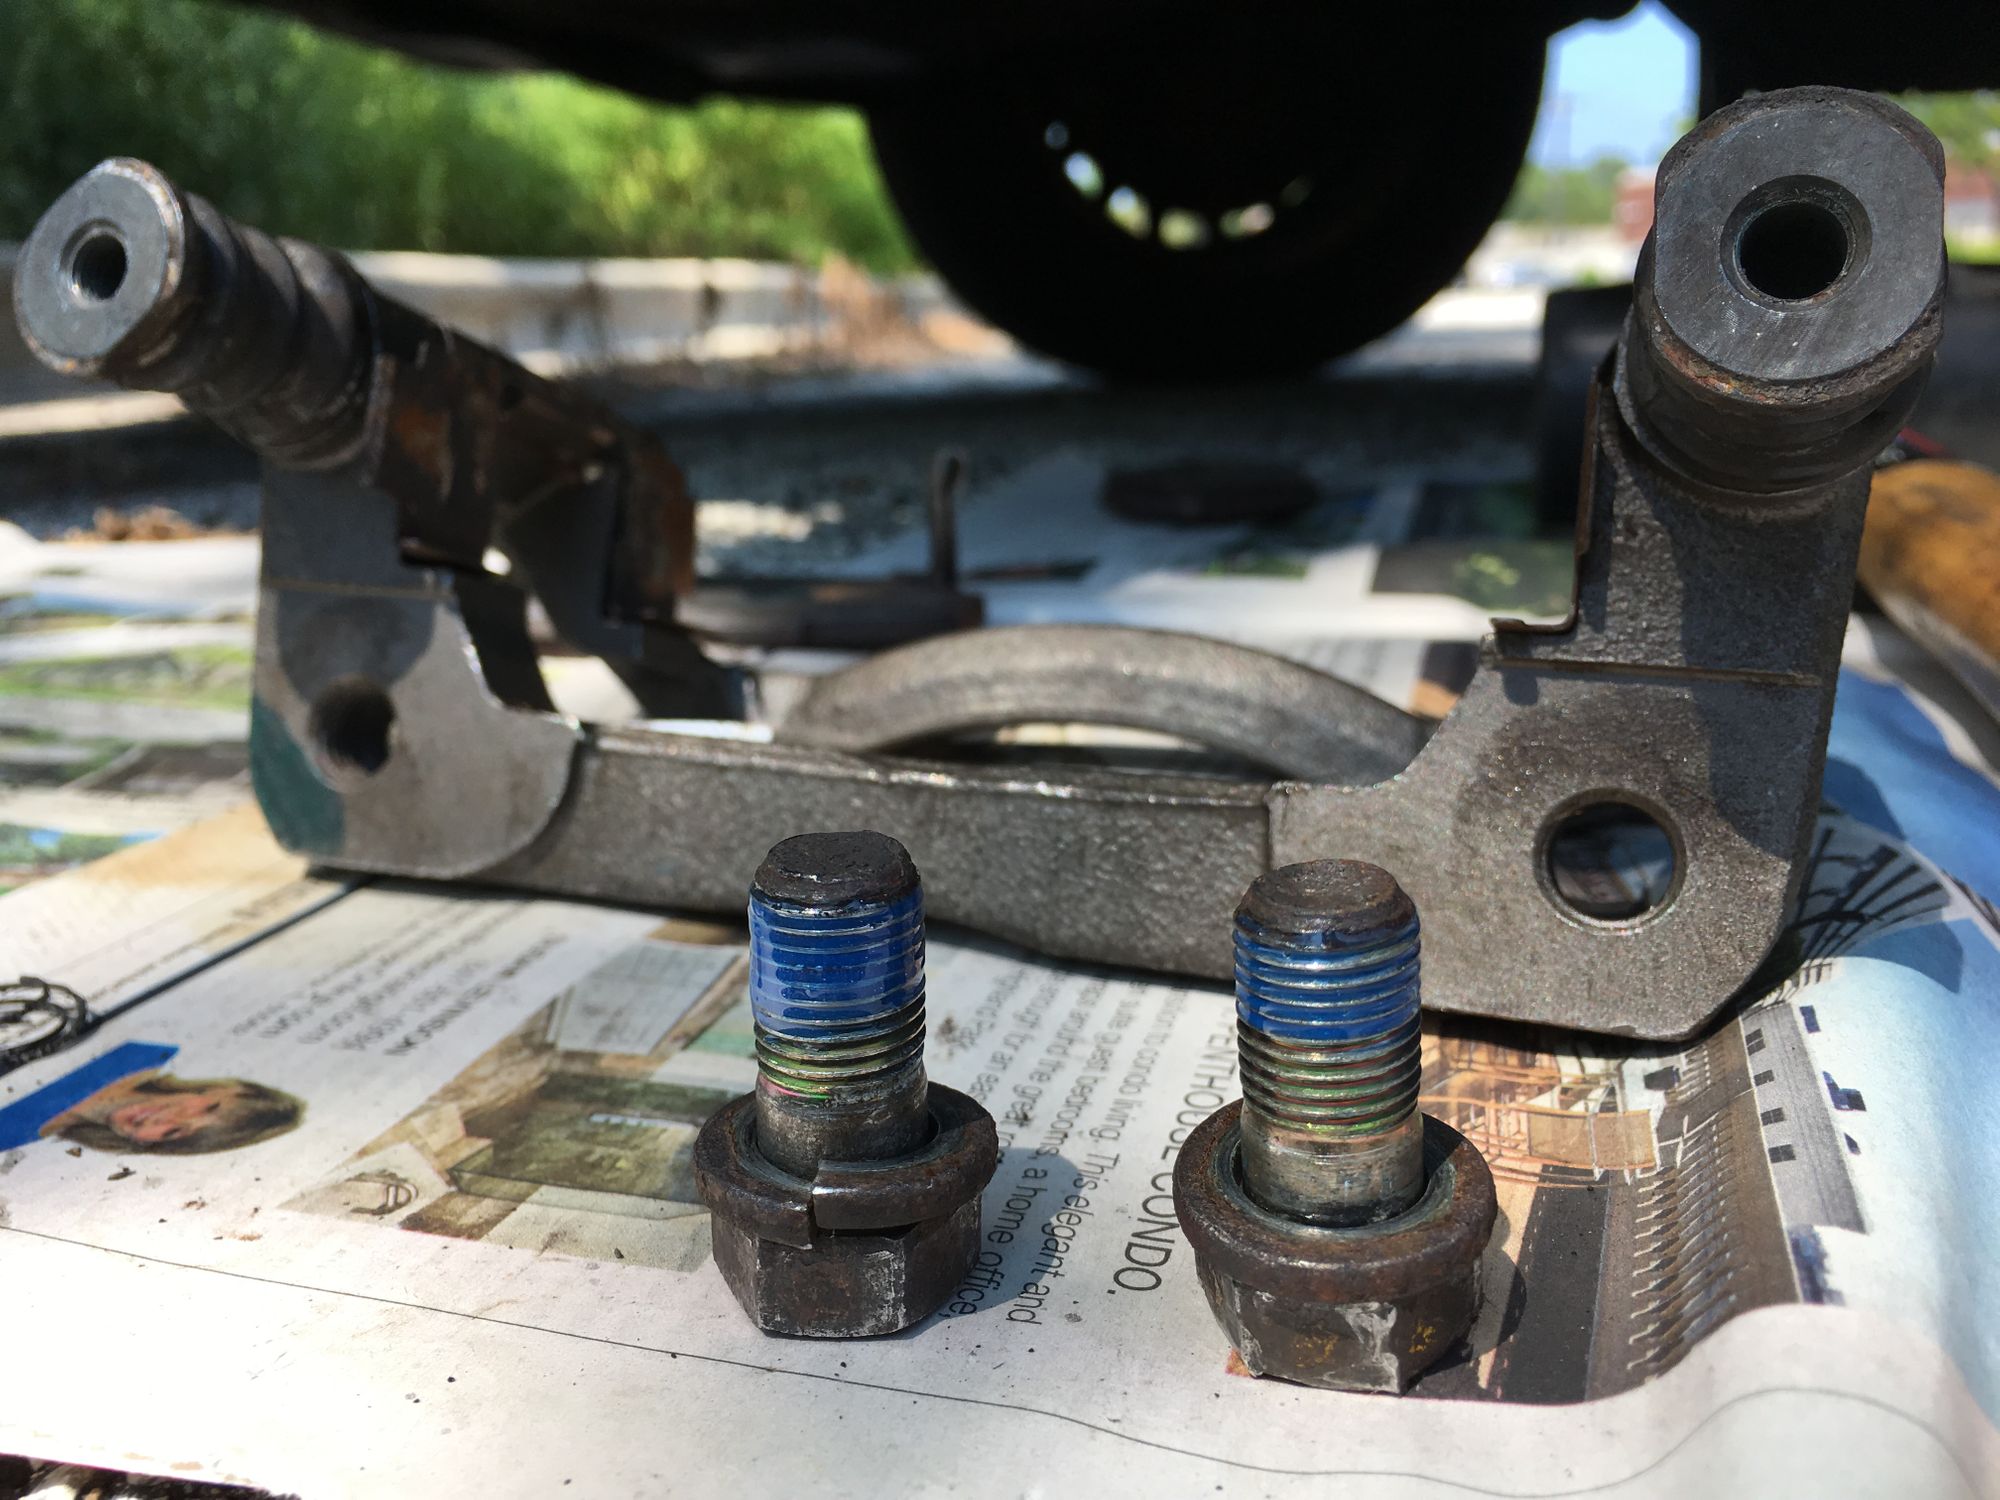
Here you see the caliper bracket bolts with Threadlocker blue on them (it makes them less likely to work loose over time).
Since I had to replace the caliper bracket, I had to remove the pad mounting brackets (they work like spring loaded mounts) from the old one to the new one. I was a little nervous doing this, because I expected them to be rusty and hence brittle/fragile. Liberal use of Brakecleen helped clear out the gunk and make this easier, but I will buy a new set of mounting brackets (just listed as "brake hardware" on auto parts websites) if I have to do this again.

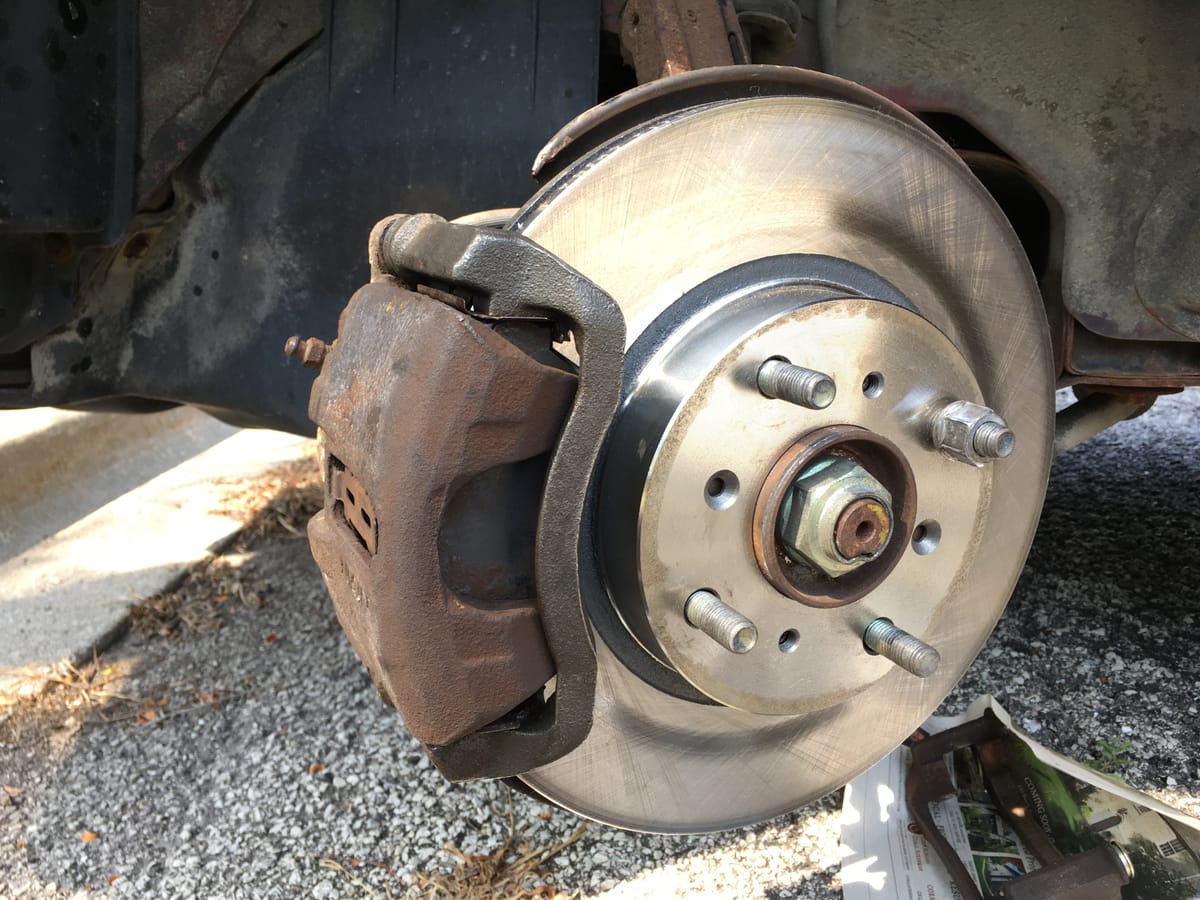
Here’s a photo of the new bracket mounted with the new rotor. The new rotor is held in place with a wheel nut. I found that the CV half shaft on this side will need a replacement sometime soon too. A bummer, because that is a major repair.

The new brake pad on the bracket has some copper anti-seize on it (one has to be very careful to not get it on the rotor itself). It’s basically a very high temperature tolerant lubricant.

The brake pad shims were rusty too. Perhaps worth replacing, but not critical to the repair.

The new brake pads + new caliper mounting bracket + new rotor

After carefully cleaning the caliper piston using Brakecleen (it’s bad for rubber parts), I used a break pad spreader to push the caliper piston in. I could have fashioned this simple tool myself, but decided to take the easier route of just buying it ($8 from Oreilly, available for about $6 on Amazon).

Everything is in place and all bolts torqued to spec using the torque wrench I bought for this work.

The right side was much easier because I did not have to replace the caliper bracket. It was also very rusty (you can also see the CV shaft on this side was replaced very recently).

And you see the new hub too!

Very easy/smooth replacement.

Red dragon has new teeth!

And we are pretty much good to go.